Domain Names
Buying the Name
Now it’s time to secure a domain name for our website. Consider the name you would like to use for your site and search for it using a DNS (domain name system) registrar like: Porkbun, name.com, iwantmyname. (I will be using porkbun.com for demonstration) Depending on the TLD (top-level domain—.com, .net, .org, etc), most domain names are fairly cheap and usually only ask for a yearly fee. Because we’re using github pages to host our websites we don’t need to pay for monthly hosting fees and server space, which is normally the case.
When you’ve found the one you like, go ahead and purchase it.
Making a new repository
Next, we’ll want to set up a new repository in github—one that’s separate from our class site—so we can apply the domain name to the final project instead of the class site.
If you need a refresher, follow the instructions on the class site tutorial. Make sure to initialize the repository as public and with a readme and turn on GitHub pages like we did before. Clone the repository to your computer using the GitHub desktop app, just like before.
Next, we’ll want to transfer any existing files from the final project folder in the class site into the newly created local repository folder for the final project. At the very least, we’ll want to add an index.html file with some visible element (ie. “Hello World”) to the folder so we can test to make sure that the domain name works!
Connecting the Name
Now that we have the domain name and our new repository, we’ll need to create a connection between the two.
First, navigate to the settings panel of your github repository and open the github pages segment. Input your domain name into the “custom domain” field. This should just be the basic domain including the domain name ending. You don't need to include “https://” or “www.”

Now, log into your DNS registrar and search for the section to edit the DNS records for the domain name. Usually the option you’re looking for is called something like “Manage DNS Records”. Sometimes you have to open the advanced options for the particular domain you are trying to edit. If you are having trouble finding the correct page, try searching google for “[Your DNS Registrar] edit DNS records”.
(Note that the screenshots and actions are particular to porkbun and will differ based on your DNS provider)
The first type of record we’ll be making is called an “A” record. An A record connects the domain name to the specified IP address of the server hosting the site. Github uses 4 dedicated servers for github pages websites. If one or more servers crash or fail for some reason, then there are backup servers to redirect traffic in the meantime. So, we’ll need to add 4 different A records that point to the following IP addresses:
- 185.199.108.153
- 185.199.109.153
- 185.199.110.153
- 185.199.111.153
You can leave the “host” section empty (in some services like NameCheap they require something in the host field, if this is the case input “@” into the host field). In the “answer” field paste the IP address. Repeat this for the 3 other IP addresses.
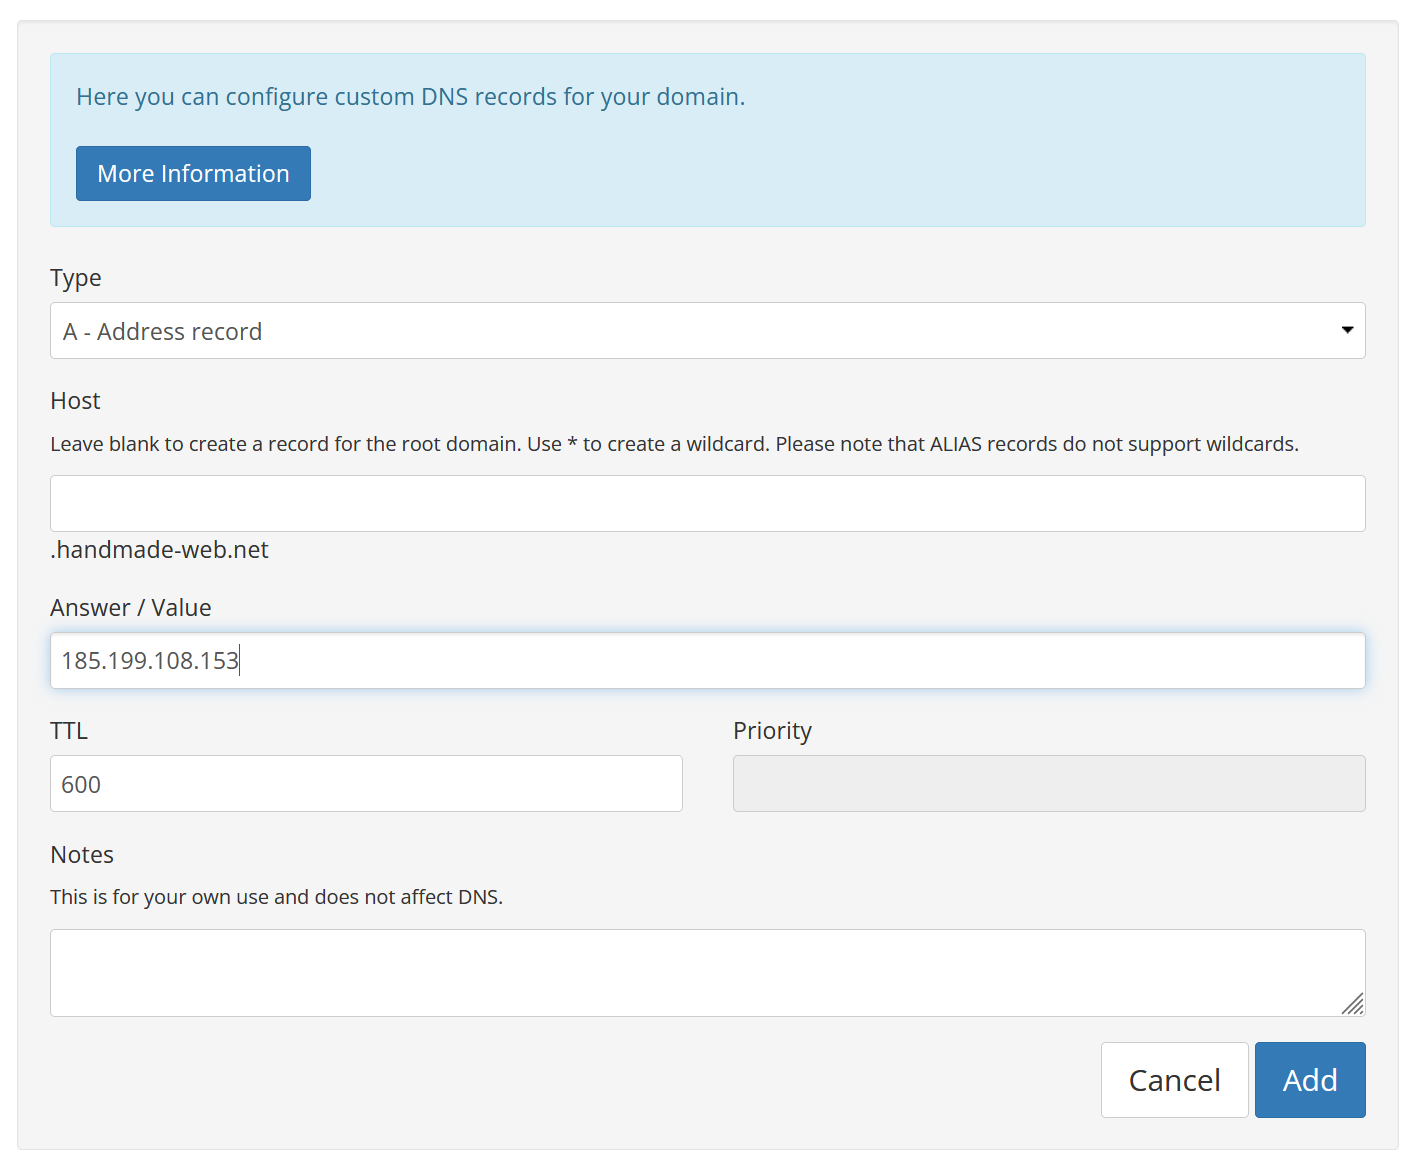
We can leave the TTL (Time to live) at the default value. The TTL determines how long particular records are cached on a nameserver. The units used in TTL are in seconds, so a TTL of 300 is 5 minutes long.
Next, we’ll make a CNAME record, with “www” in the “host” field and our domain name in the “answer” field:
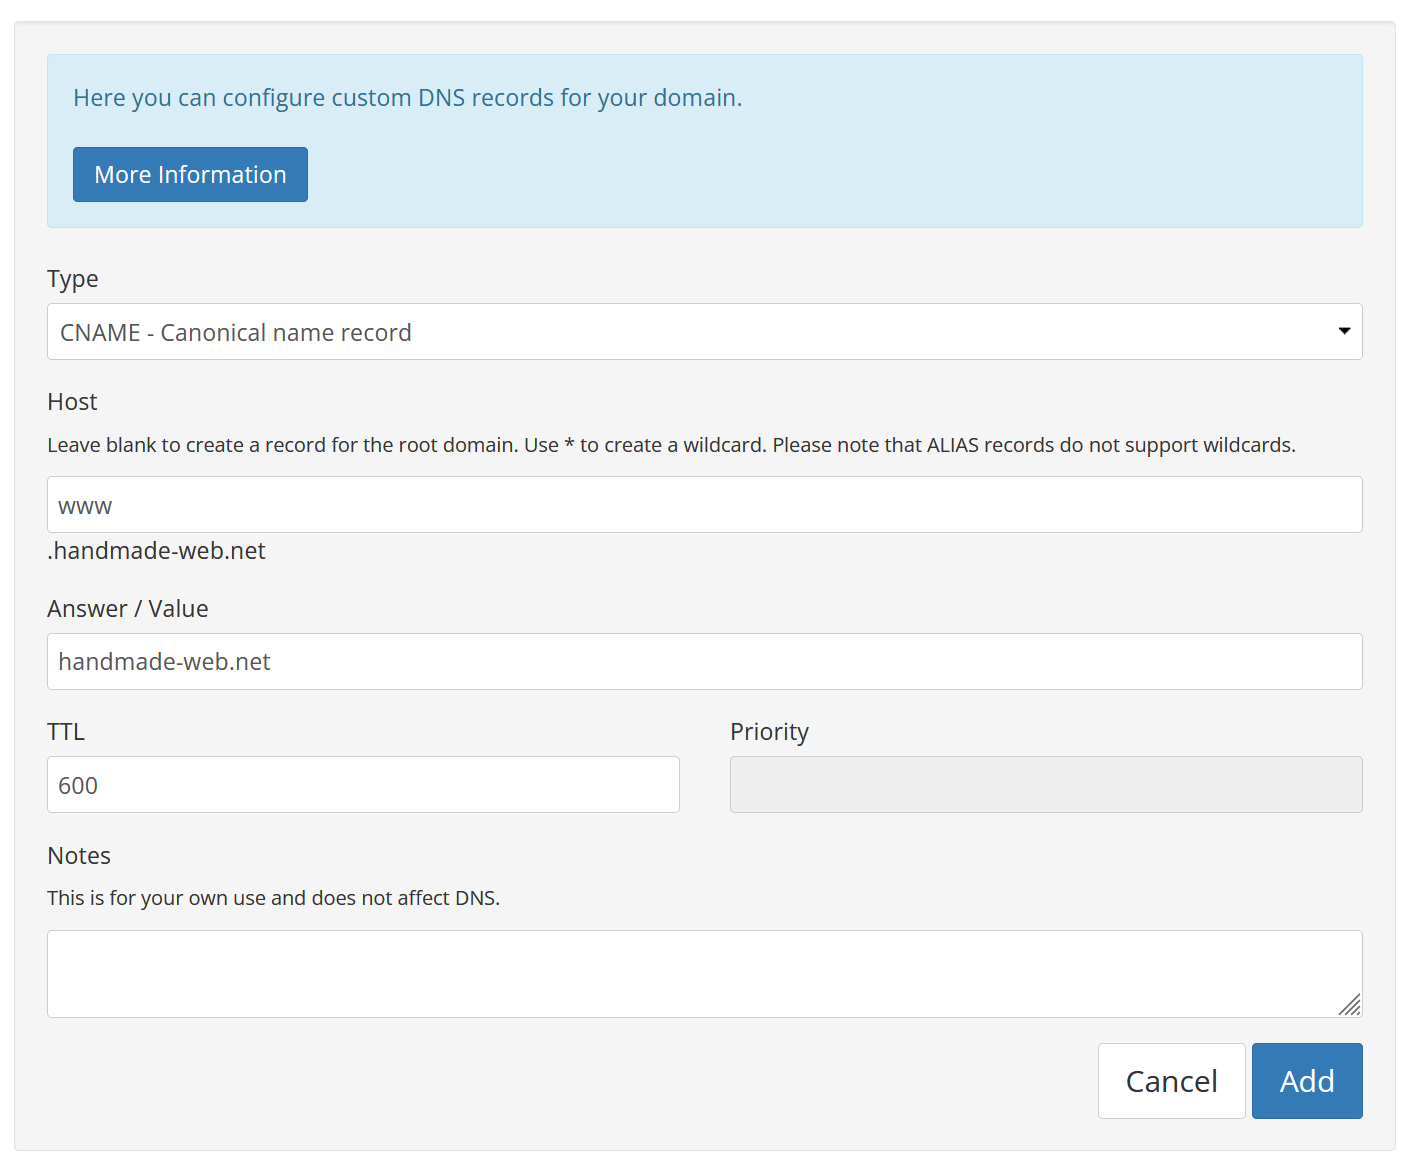
This will create a redirect to our domain name if someone were to type “www.” in front of our domain name.
If you’d like to read more about this, all of the information from this guide comes from here.
Waiting
That’s all we need to do! The last step is to wait… It may take a few minutes before the server connects the domain to the repository, so try to exercise patience.
If it still doesn’t work after a while, try opening the website using the new domain name in another browser or using another device to make sure the browser cache isn’t causing problems.